How to set up custom domain name for the github pages hosted site

Once you have followed the steps in the previous article, you might want to deploy it to your own custom domain rather than the github.io domain. But you are just a student and cannot afford to pay for your own custom domain? Well, no need to worry! You can get the .np domain for free, provided by the Mercantile Communications for personal sites. Getting the domain is the easy part. Once it has been approved, we will be adding nameserver for our domain in Cloudflare. Lastly, we will be making the required changes in our github repo to host it on our custom domain.
Let’s first start with how we can request .np domain to Mercantile Communications.
Register free .com.np domain
- Go to https://register.com.np/register and create a user account.
-
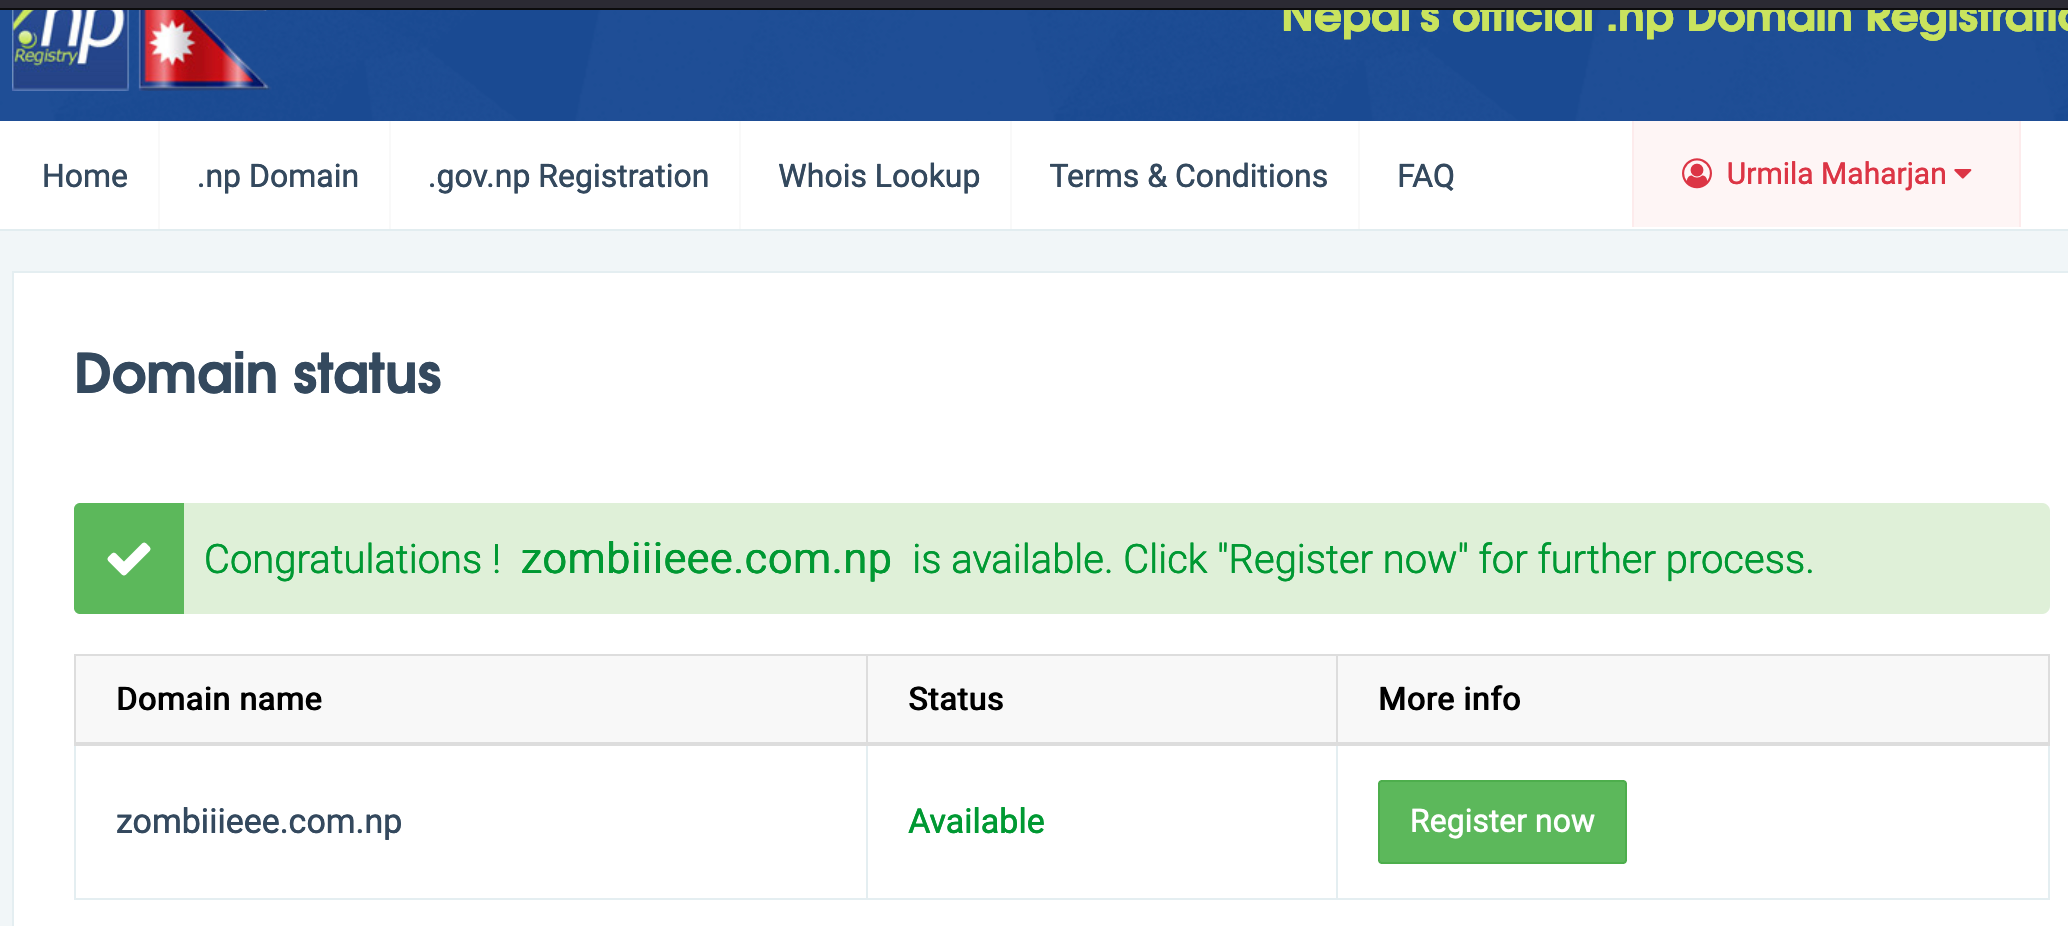
Login to https://register.com.np/login, check for the available domain name, and register.
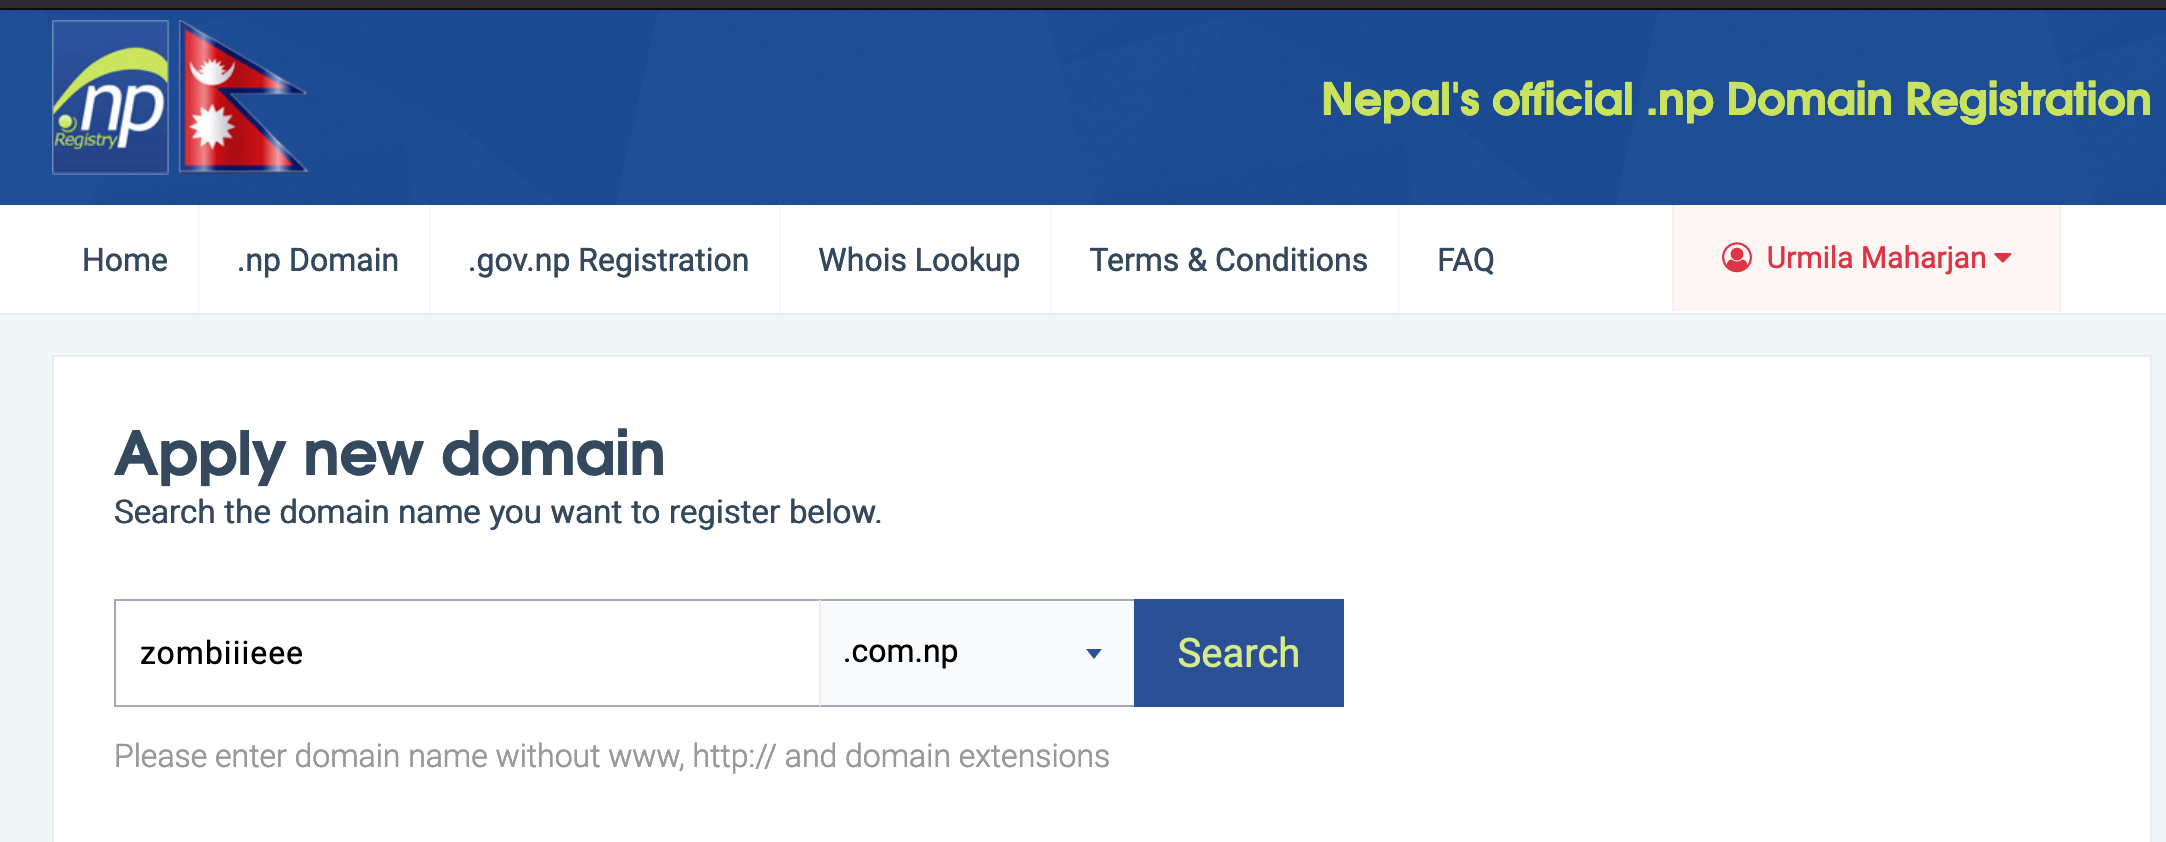
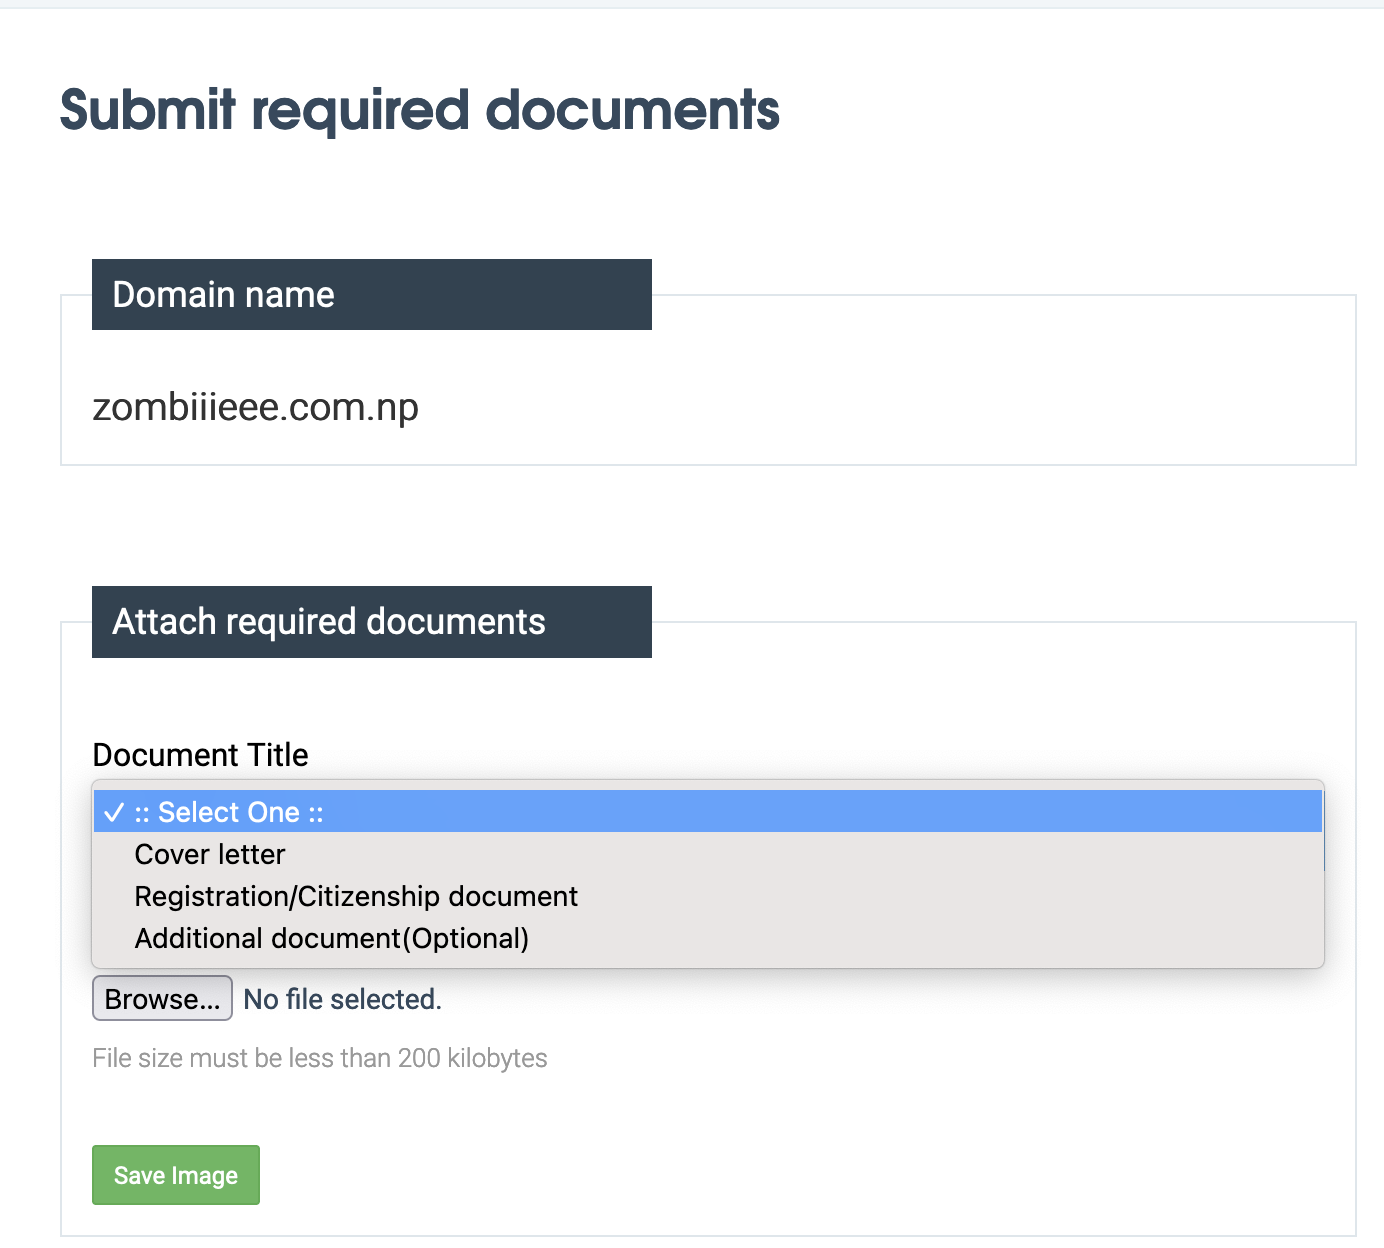
For personal use, the domain name must be directly linked to your name in the citizenship/passport(whichever document you decide to attach later), otherwise there is a high chance that it will be rejected.
-
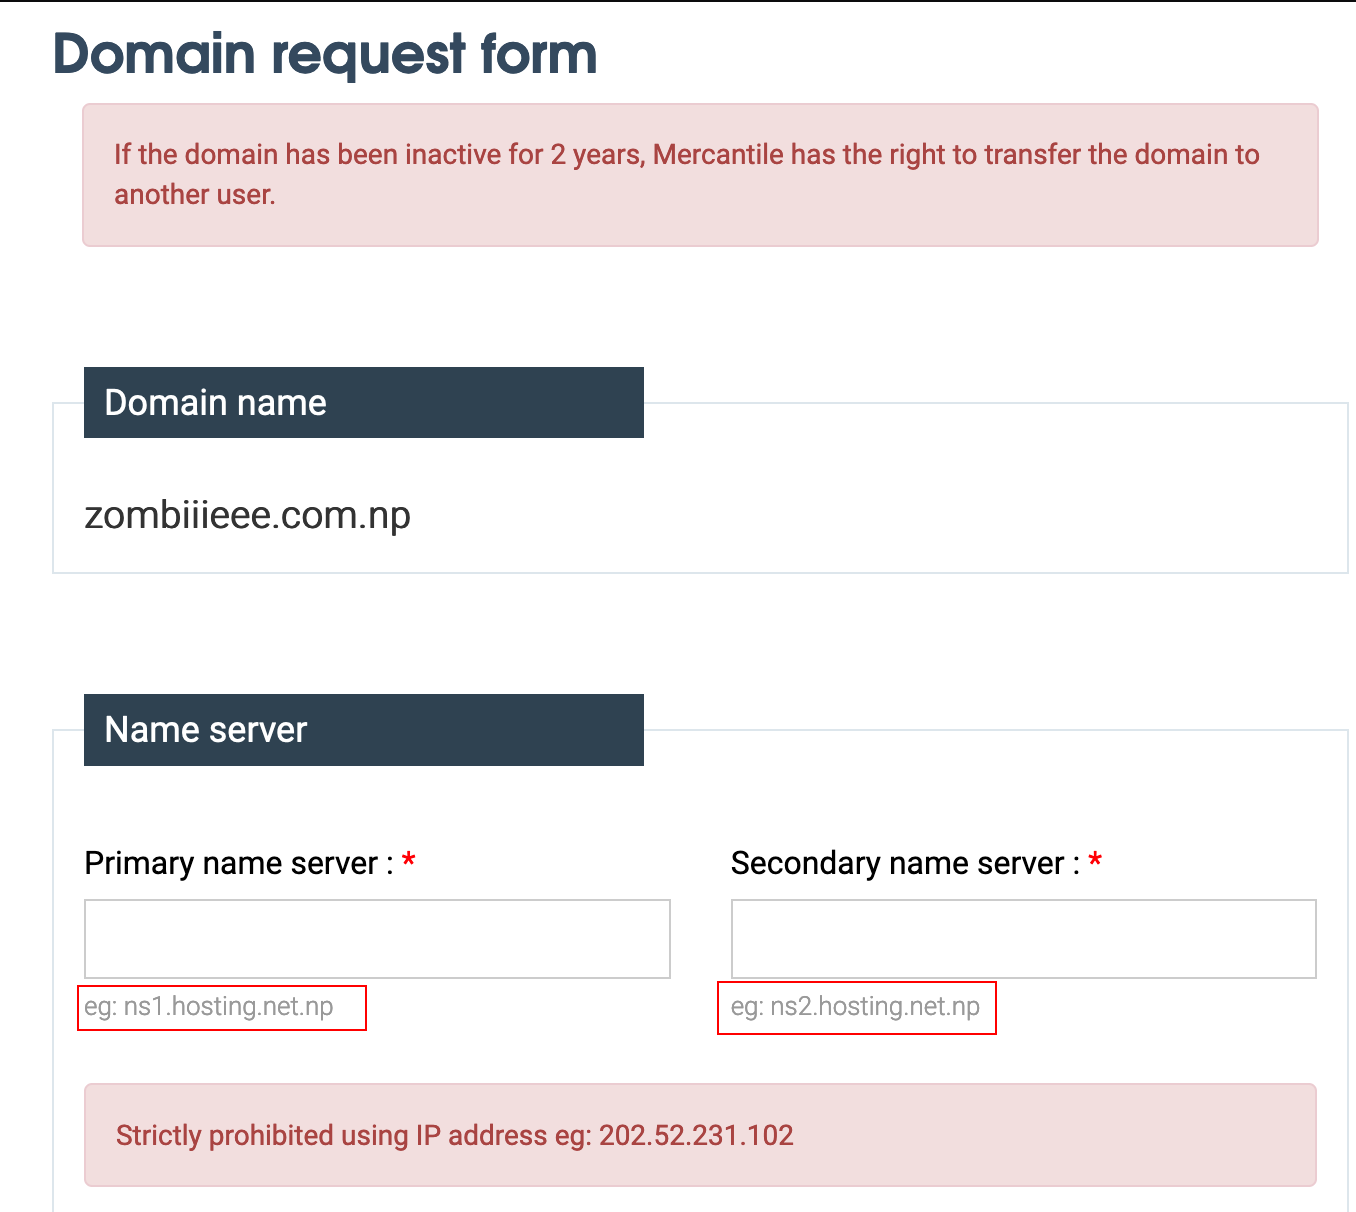
You will be asked for providing the name server for the domain. For now, just copy the same example that you see i.e. ns1.hosting.com.np and ns2.hosting.com.np . We are later going to change this with the name server provided by Cloudflare for our domain.
-
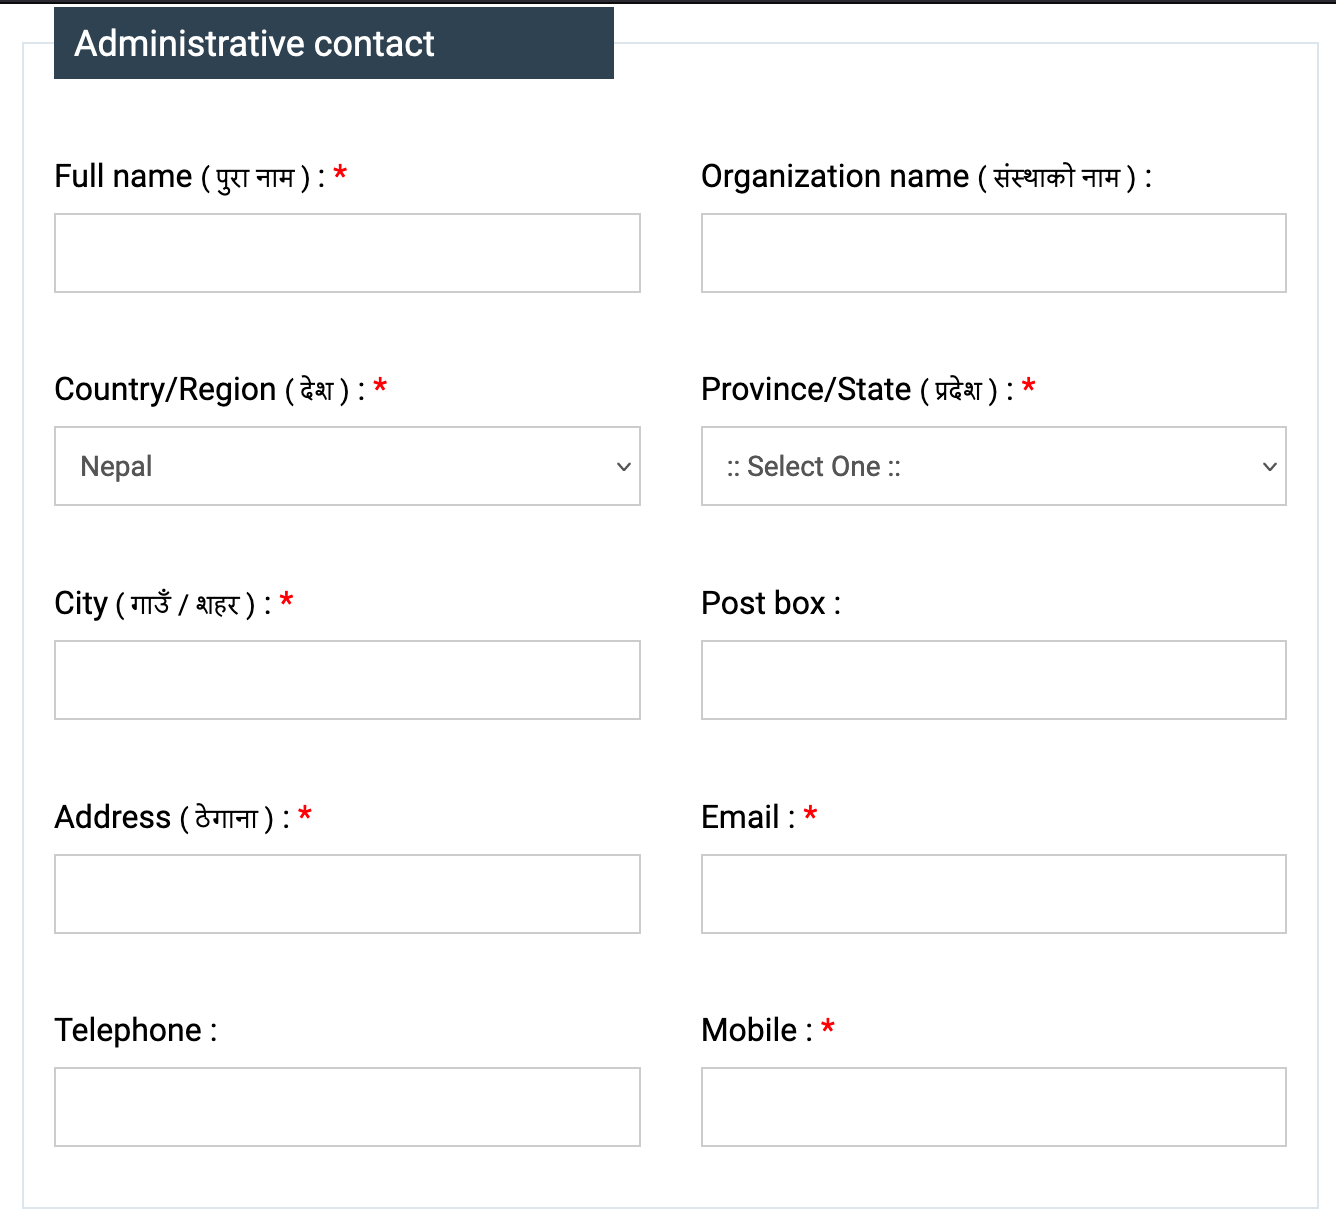
Fill in the other personal details. You need to attach the image of any one of your identity cards(e.g. citizenship). For the cover letter, you can use any of the cover letter generator for custom .np domain that you can find in the internet(e.g. https://timeandupdate.com/2018/05/cover-letter-for-np-domain-registration-request/#Sample_cover_letter_for_np_domain_registration)
-
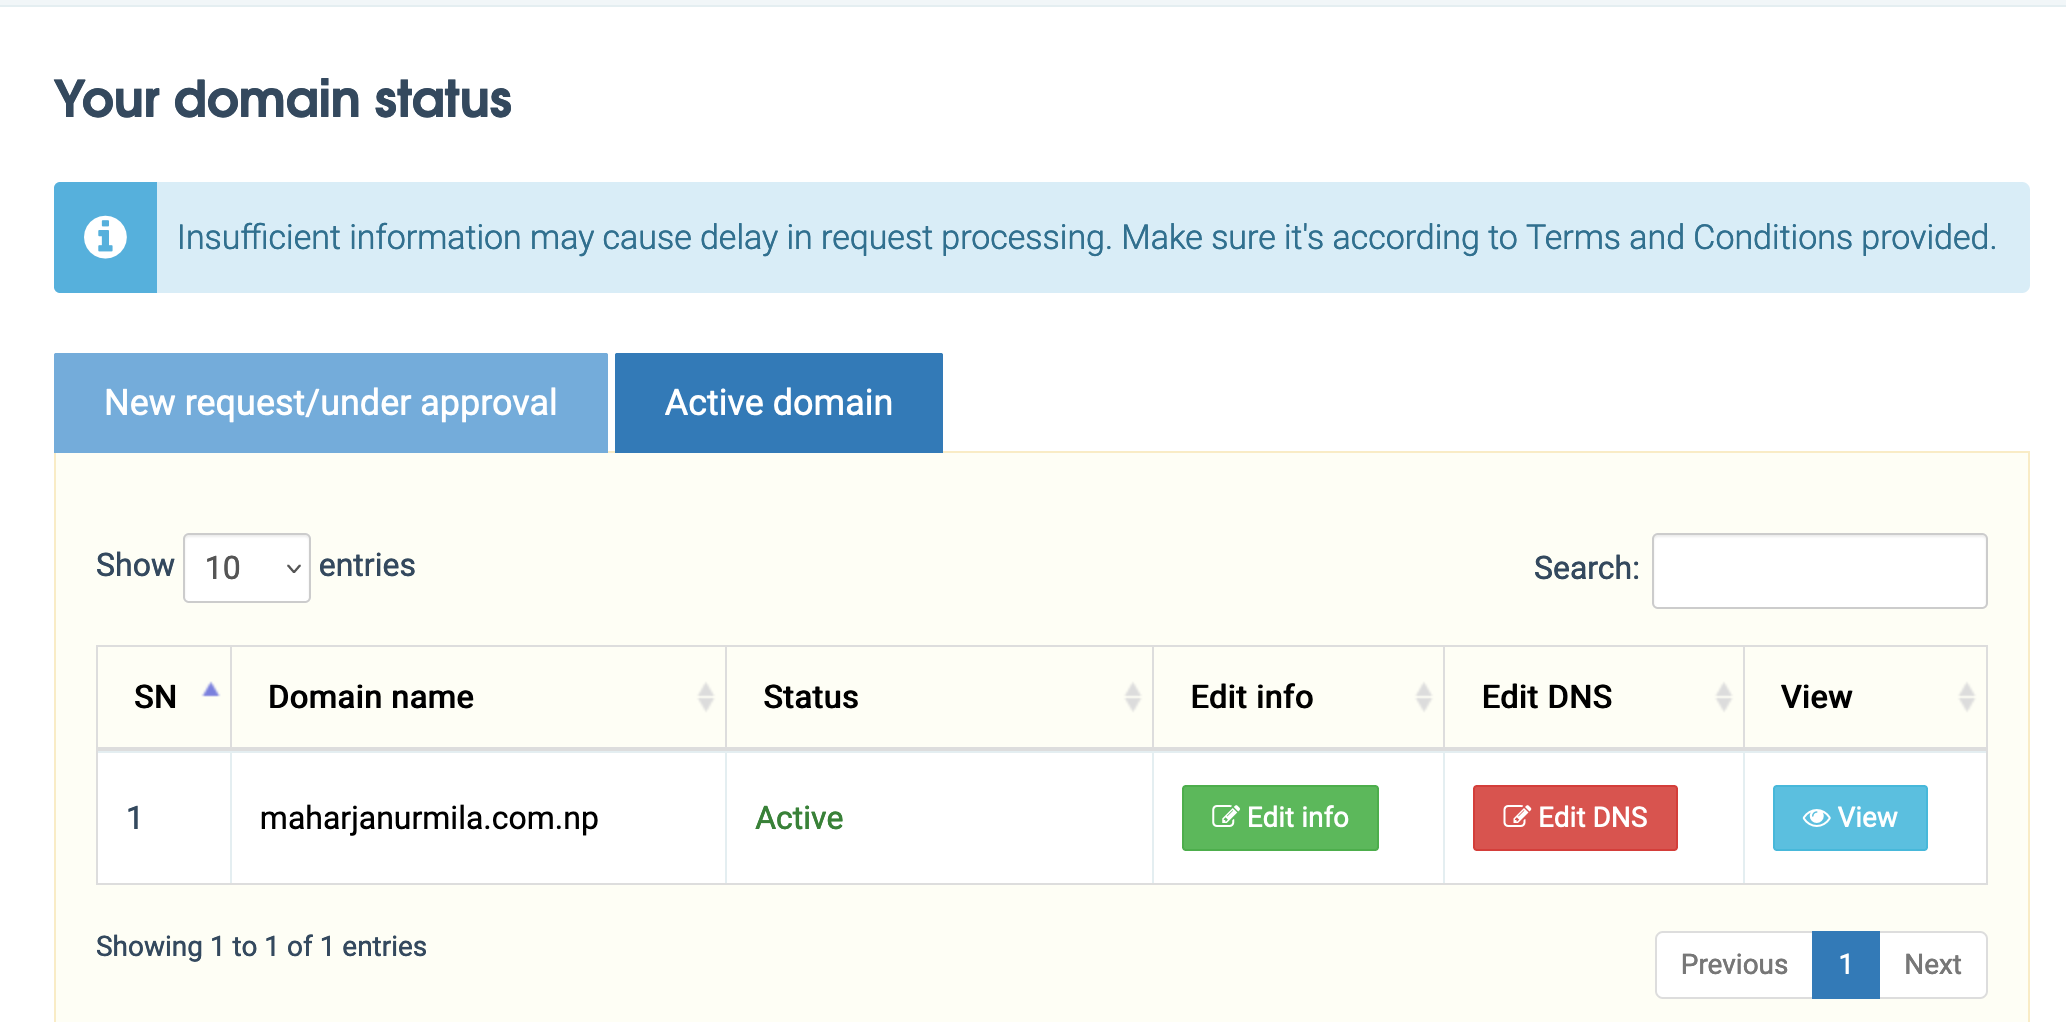
You will see the application status Wait for Approval. It might take from 1-2 week to get it approved. Once approved, the status will change to Active. You will also be getting an email but it might land in your spam folder. So, be sure to keep an eye on the spam folder as well.

Nameserver setup using Cloudflare
- Go to https://dash.cloudflare.com/sign-up and create a new user account.
-
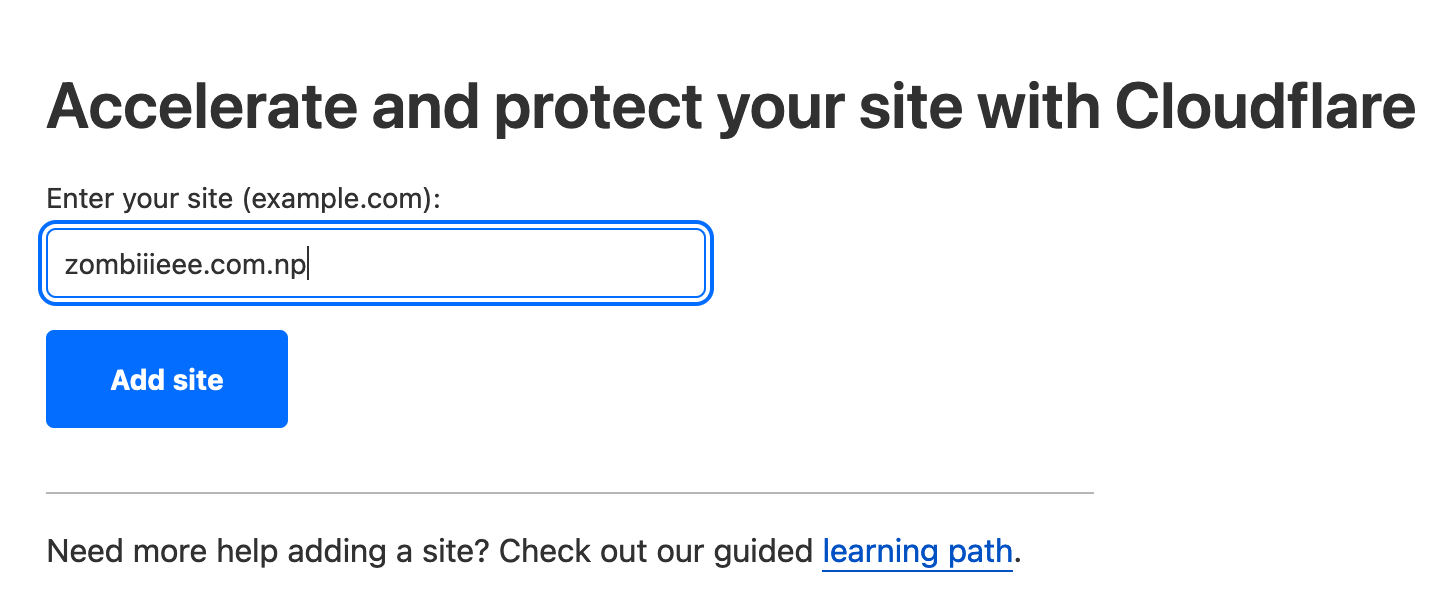
Login to Cloudflare, click on Add a site button located at top navigation bar.

-
Enter the domain name that you just got approved and select “Free Plan”.

- You need to add DNS Record for your domain. It basically means adding the domain name to IP address mapping entry so that browser knows where to route the request in the internet.
-
To get the IP address of your github.io site, you can simply run the
digcommand as:dig https://<your_username>.github.ioLook for the ANSWER SECTION in the output. It should give you numerous(4 in my case) IP addresses. It is due to the fact that github maintains multiple servers for github pages for fault tolerance and geographical distribution. You need to add all these 4 IP address mapping DNS records.
-
Click Add Record and select the record “Type” A add your domain name in “Name” field and one of the IP addresses(received from the dig command) in the “IPv4 address” field, set the “Proxy Status” to DNS Only, “TTL” to *Auto. Repeat the same for all the remaining IP addresses.
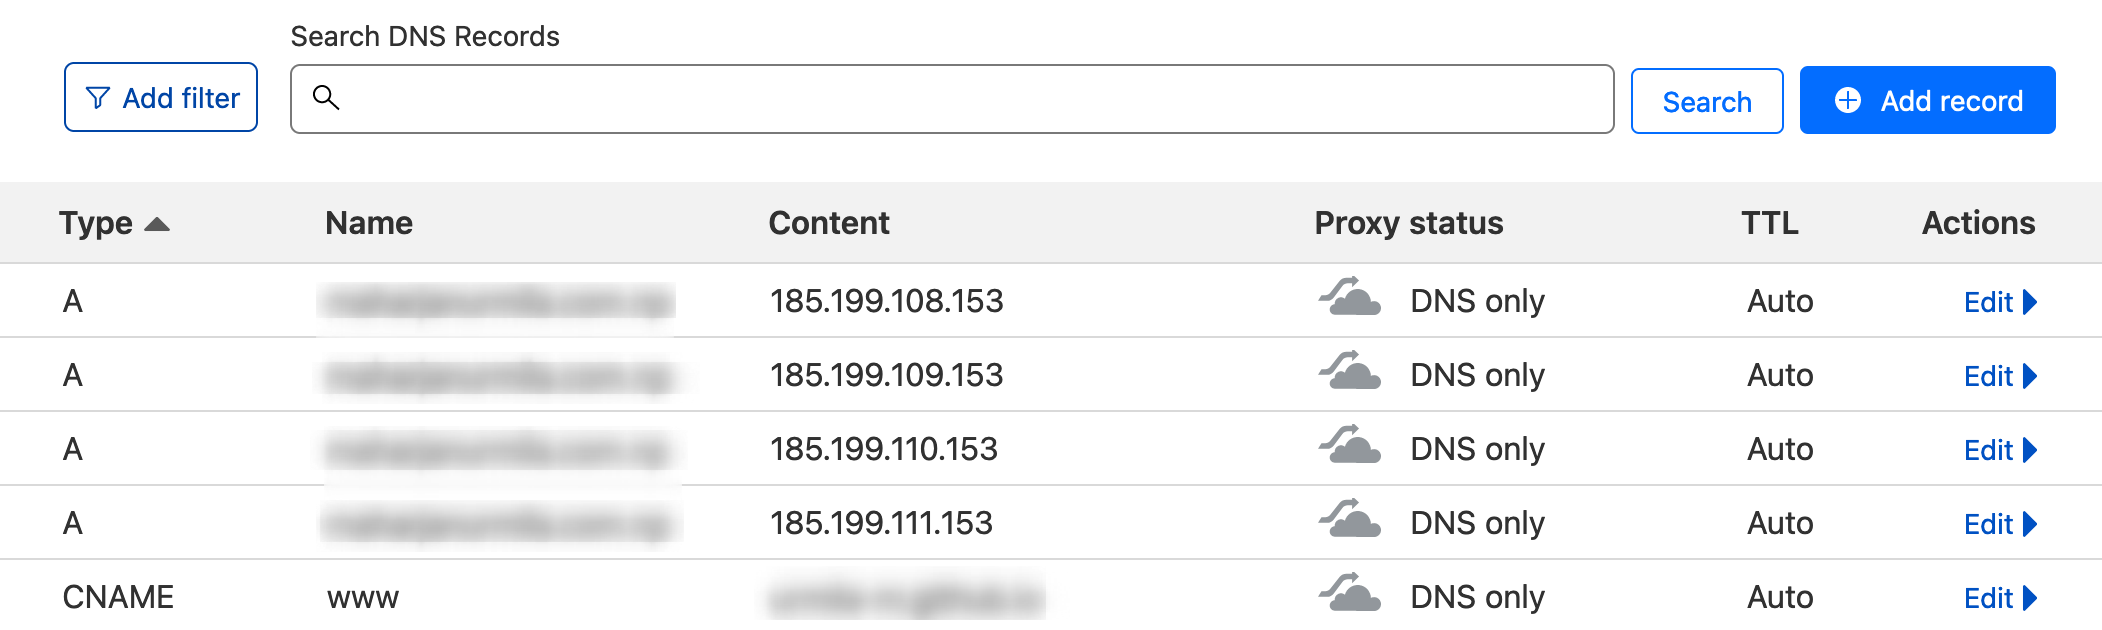
- Lastly, add a CNAME “type” of record with “Name” www and “Target” {your_username}.github.io with all other configurations as before. This ensures that
www.customDomainNamewill also redirect to your website. -
When you click on Continue, you will see the nameservers that Cloudflare has provided for you. Cloudflare provides these name servers only after the site for your domain has been added to it.
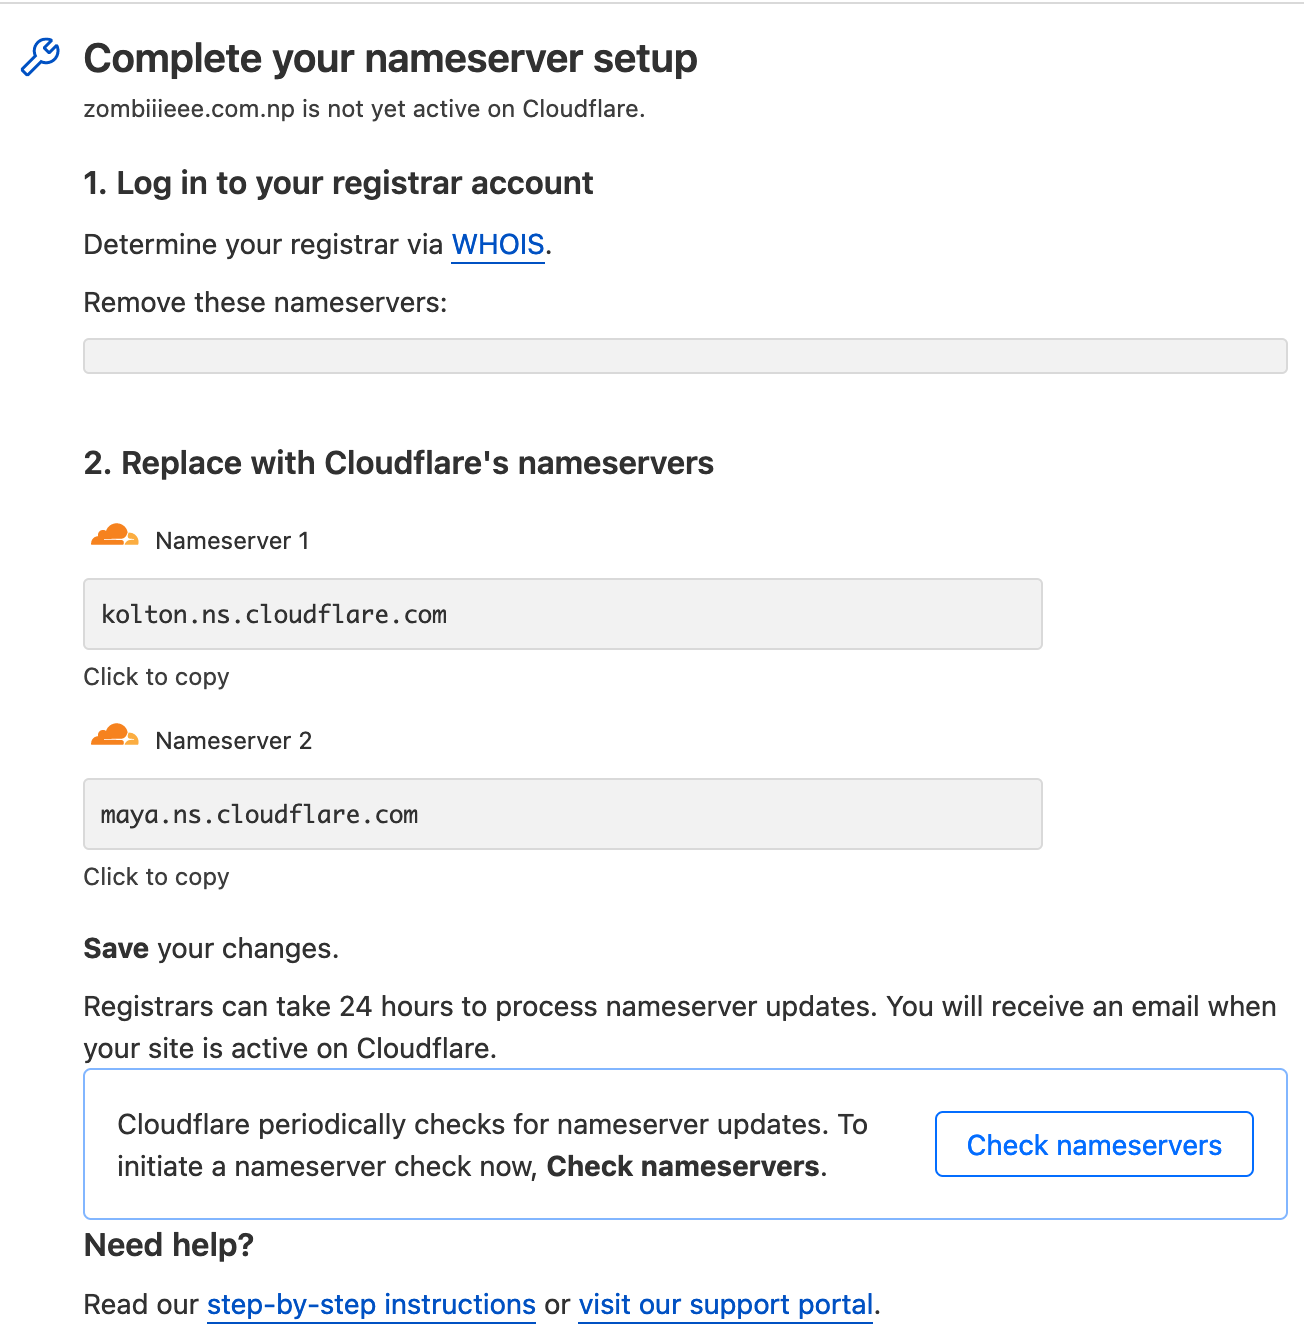
But we need to pre-fill the nameserver fields during domain registration. So, we just used the dummy ones provided in the example. Now, we need to update that. To do so, login to the https://register.com.np/login again and go to Active Domain and click on Edit DNS and enter the nameservers that you just got from Cloudflare. It might take up to 24 hours for the DNS change to take effect. When the changes have taken effect, running the command
dig <your_domain_name>should give back the github IP address that we set in the A record. -
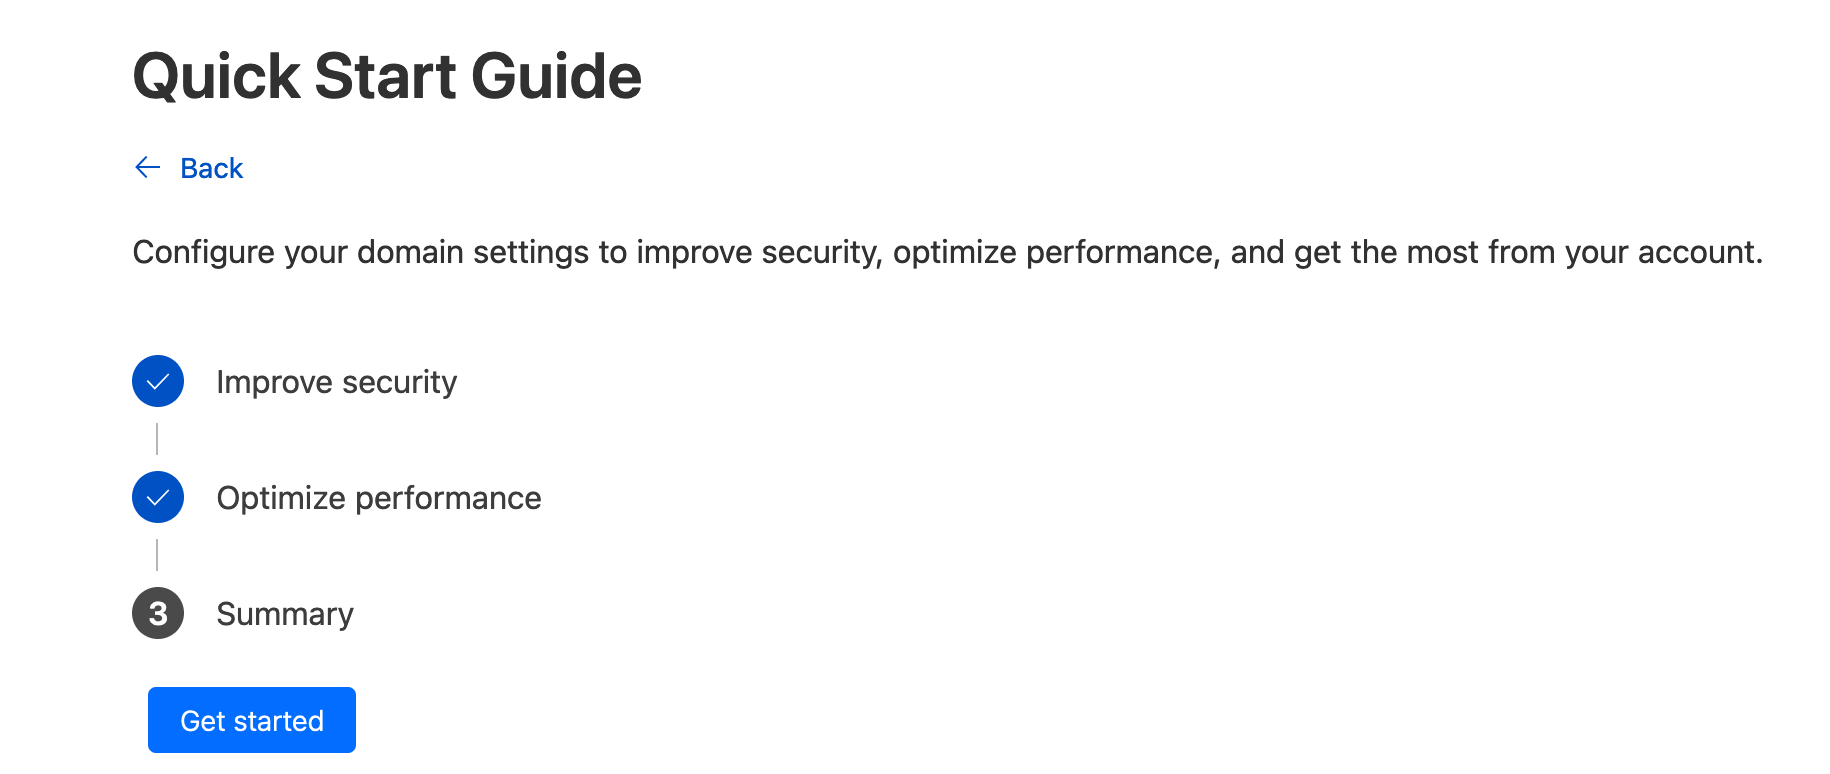
You will be prompted to complete the Quick Start Guide. Make sure to turn on the Always use HTTPS and Automatic HTTPS Rewrites option. Brotli is for compression.

Github configurations
-
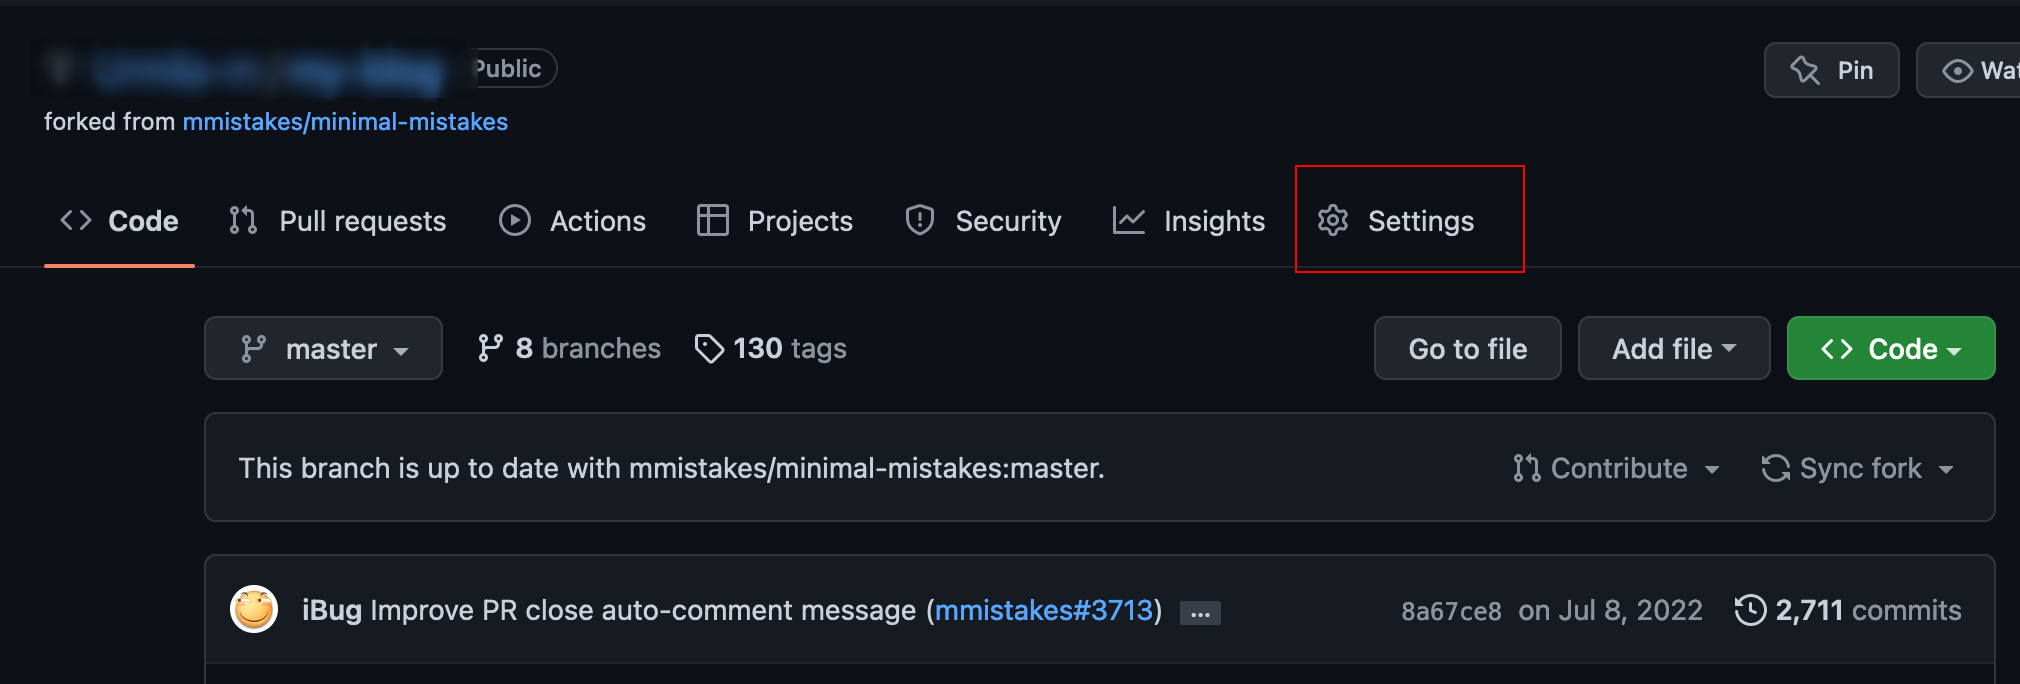
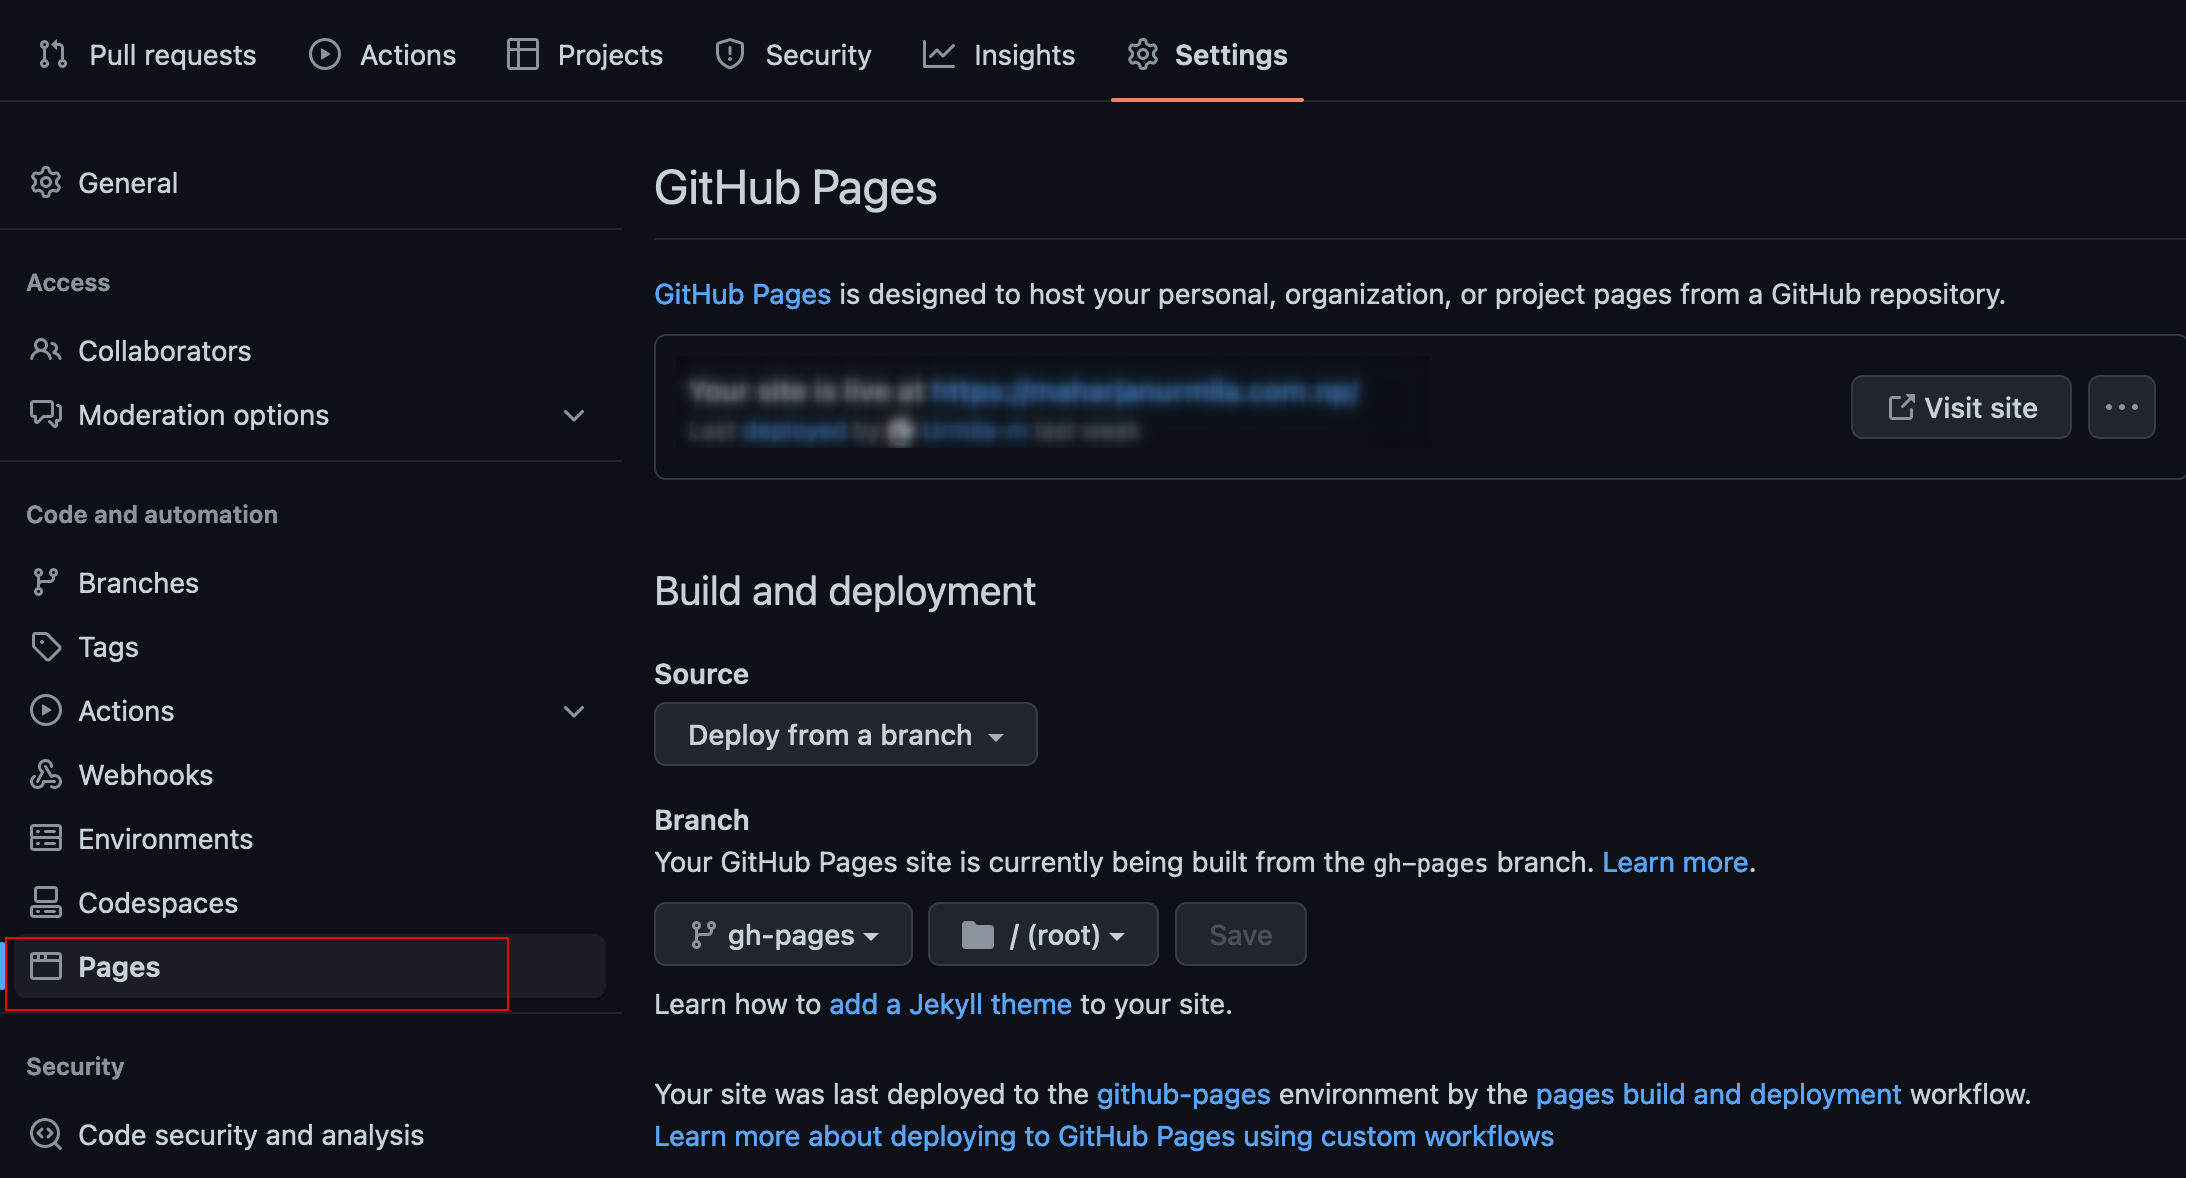
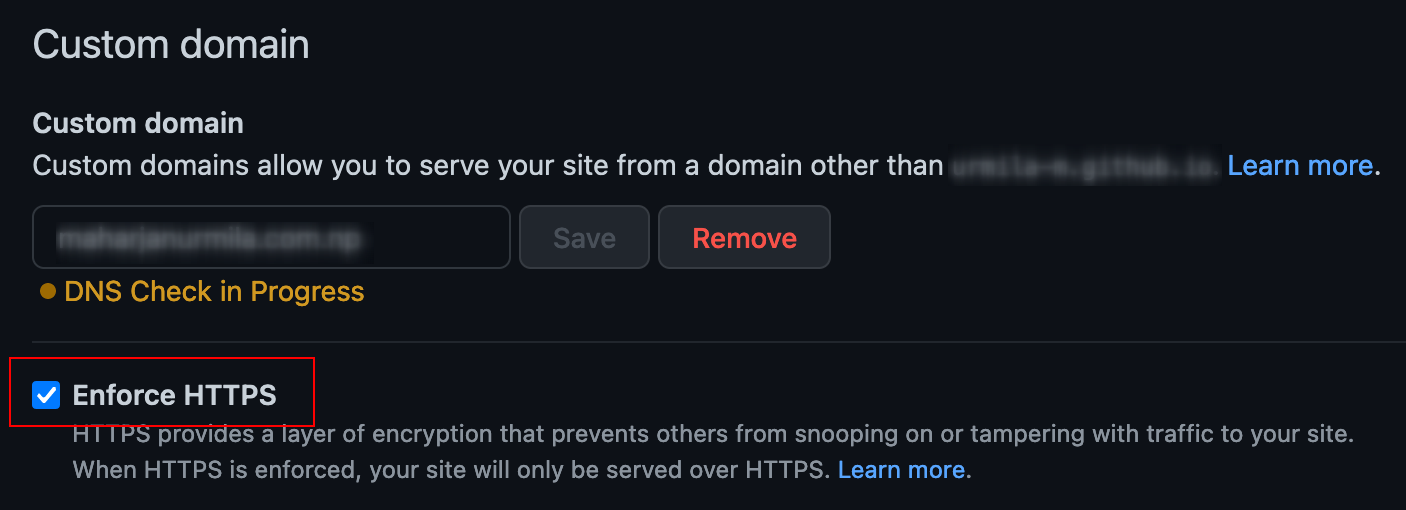
Go to the github repository Settings > Pages and in the Custom Domain section, add your domain name.
-
Tick on Enforce HTTPS option so that you will be redirected to https even when entering just the http in the search bar. This option might be greyed out and not immediately be enabled. You might need to wait for 24 hours to enable this option.
-
If not generated automatically, add a file named CNAME to the github repository which contains your domain name. You can take the reference here. CNAME is just an alias for another domain. With this file added, all the requests to github.io is redirected to the custom domain.
References
That’s all. Now, your site should be reachable through the custom domain that you have set up!